How to tackle a huge project | A SOP Story
TL;DR? There are four things you can do to make a huge project not only seem manageable but be manageable, even as you keep saying to yourself, “What was I thinking taking this on?!?” (1) Know what you’re trying to do and break it down into manageable steps as soon as possible. (2) Track your progress in a way that fosters momentum. (3) Be realistic about your energy levels. (4) Plan for implementation in a way that, as much as possible, lets you be mindful but thoughtless (i.e., well-considered but requiring no real decision-making when it comes time for application).
When I decided in November 2021 that I would release/launch the first official Blou Designs on-demand course on January 4, 2022, I had a lot of work ahead of me.
The course idea was chosen and vetted. The overall format was chosen (i.e., asynchronous, work at your own pace, but with a means of reaching out to me for questions/issues). But I had done none of the development work. That meant I had roughly 1.5 months to:
- get really specific about the learning objectives and how they would be made achievable via the overall learning paths and the individual lessons,
- create a dataset and projects that students could use to work through (I’m a believer in hands-on learning experiences that promote transference to other scenarios),
- script, record, and produce all of the video-based lessons, along with any “structural” videos (e.g., “how to get the most out of this course”),
- get the course materials, including supplemental reference downloads, developed in time for my beta testers to review the course materials and give me to time to incorporate that feedback before launch,
- keep the course viable as a paid course – what would make this worth spending hard-earned money on, particularly as prices everywhere are increasing and budgets are getting tighter, and
- not lose momentum, not let production fatigue lead to decisions that would jeopardize the course curriculum, and not completely sap my energy so I’d have nothing left in the tank when St. Nicholas Day, Christmas, New Year’s, and launch day came around.
If you’ve ever talked to me or read any of my posts about standard operating procedures (SOPs), you know I believe that a good SOP helps you mitigate and hopefully prevent deal breakers and headaches. That’s the reason this last bullet point was written as a series of “not” statements, and it was the guiding principle I used as I approached the SOPs for this project.
Here’s a glimpse into some of the “SOP Objectives,” along with some of the SOP details, that kept me sane and productive. Any resources mentioned are listed at the bottom of this article.
Know what you’re trying to do and break it down into manageable steps as soon as possible
It’s very easy to feel overwhelmed until you’ve got some idea of what the steps might be.
It’s also very easy to be led astray by minutiae (e.g., “almost perfect…one more tweak…”) and shiny object syndrome (e.g., “wouldn’t it be cool if…”) once you’re deep into a project.
So, before I took a single implementation step, I defined an outline of an optimal product. This process took about two weeks in total. I knew it was vital to set this foundation correctly, because everything else would hinge on what I did here, so, even though I panicked a few times about how much time was passing on this part of the process, I didn’t let myself rush.
Course sections and lessons – Rely on the expertise of others when it’s not your “zone”
I went into this project with some idea of what real people in the real world need to do with mail merge and data-responsive reporting using spreadsheet-style data, because I was working from client scenarios. I also had experience designing courses in various formats. Neither of those things make me an expert in online course design, and certainly not in efficient online course design.
Kat Sorbello, founder of The Stella Way Consulting, had come to speak to the vidwheel Creator Network (vCN) earlier in 2021. Following this talk, I had explored her website and YouTube channel, and found a downloadable, Excel-based template for designing online courses. What I loved about this template was the framework used on the Learning Outcomes worksheet, which supports the course designer in accounting for the learning outcomes, knowledge, skills, and abilities of the course modules/sections. I modified this worksheet to include not only the modules but also the individual lessons, which enabled me to both audit my course components against the framework and see everything together on a single list. This gave me a nicely formatted and consolidated means of “auditing” my content, especially with respect to cumulative components and ordering.
This lesson list was shared with beta testers to assess whether they felt anything was missing before I developed anything further.
Course data collection scenario and dataset – Rely on your own expertise when you have it
Since the course was designed to be project-based for both the Beginner’s Basics and Intermediate Topics sections, and I wanted students to be able to measure their progress against predictable outcomes, this optimal product also required a data collection scenario and dataset.
Data that needed to be used in a certain way would need to be shaped and populated in a certain way. I spent almost a week designing, creating, and vetting the faux data collection scenario and dataset in order to make sure that it could account for everything I wanted to cover in the lessons, and in a way that would “make sense” and foster transferability to my students’ real-world needs. Vetting largely consisted of making sure that if a lesson was designed to develop a skill, then there existed data that students could play with to develop that skill.
Track your progress in a way that fosters momentum
My Rule #1 – Do not count the videos!!
Some people love to check things off a list and get a lot of energy from watching a countdown to “done.” I’m not one of those people. If it’s done, I just want it off my list. Otherwise, I start counting the things left to be done relative to the total things to be done, and it drains my energy to creep towards completion. It gets even worse as the number of things left to go gets smaller. But sometimes you need lists where things don’t just disappear, and creating a course is certainly one of those times. That meant that I had to get out of Excel as quickly as possible, because it’s just too easy for me to count things in that format.
I decided to move into MS OneNote as my primary tracking tool. To use this format effectively:
- I created a new notebook section for this course in my notebook of course ideas.
- Using pages and subpages, I recreated the list of modules (pages) and their lessons (as subpages of their respective module pages). Visually, this made it a hierarchy, as the subpages indent a bit.
- I created an extra module for Troubleshooting, where I would address common questions associated with the content (compiled from my history of working with clients on this topic and from beta testers of the course), as well as an extra module for What’s Next, which also included other ways to work with me that extend beyond the course itself.
- Each of the subpages became a script repository. This is where I made notes on what needed to be covered and did all of my writing. This format also made it easy to click through subpages to not only write the current lesson but also modify related lessons when necessary, and all without opening multiple files or scrolling through a super long file.
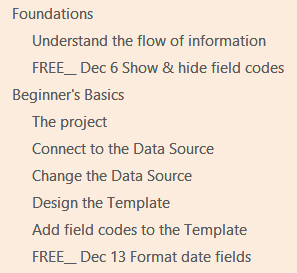
I used the page/subpage list in the section’s navigation pane to do the bulk of my progress tracking by modifying lesson titles as my primary status indicator.
I had a few video lessons that I had marked for “public teaser release” in December 2021 as I developed the course. I changed the title of those subpages to start with the date of those releases (e.g., FREE__ Dec 6 Show & hide field codes). These dates and the specific video lessons were chosen to:
- keep marketing on track for a January release, that is, one per week for the month beforehand,
- force my production to stay on track (as much as possible) by featuring one video from each of the main sections of the course: Foundations, Beginner’s Basics, and Intermediate Topics,
- give me wiggle room and a sense of progress even if my production schedule did slip, because the releases meant that I was making at least a little progress in each of the main sections, even if it wasn’t the amount of progress I had wanted to make by that point, and
- follow a rule of “free but value adding,” meaning that viewers wouldn’t have to buy the course to get the value from the teasers, that is, they could stand on their own and, hopefully, give me some non-beta-tester feedback on the product as I continued to create.
Aside from that, I also used a simple title modification to categorize the videos and keep me on track:
- Once a script was ready for production, I changed the title to start with AUDIO & CAPTURE.
- Once audio was recorded, I changed the title to start with just CAPTURE.
- Once the screen capture was also done, I changed the CAPTURE to a GO to indicate it just need to be edited together and exported as an mp4 file (i.e., “produced”).
- Once the video was “produced” and ready to be uploaded to Teachable, I removed all notes from the title. (At this point, that video was uploaded to YouTube for subtitle generation and to Teachable for inclusion in the course.)
Two title categories that really helped me out were BONUS and DISCARD.
An ideal project is one thing, but, just because it sounded good in my head during the planning stage didn’t mean it had to be a keeper. I did end up adding one video that was completely not planned, because it wasn’t until I started script writing that I realized I had a gap that would either make the one video super long or require another video. Mostly, though, when I changed from the ideal it was to cull.
Sometimes I realized that a lesson I thought was necessary actually didn’t add anything over what the lessons were already offering without it. I marked these as DISCARD so that I wouldn’t think I had made an oversight in copying the title from Excel to OneNote, and I made notes as to why it was discarded within the subpage.
Twice a week I made a timeline assessment of what still needed to be done versus the launch date, and I started making judgement calls about the ideal course versus the minimum viable product versus what was necessary to still warrant being a paid course. If I felt something would make the course ideal without being necessary to the other two, I would mark it as a BONUS. BONUS videos could be reintroduced if time permitted, but held on to for future content development if not. Mentally, this category allowed me to be gracious and forgiving with myself – I wasn’t failing to deliver, because delivery hadn’t been ruled out, and, for students that didn’t know I had ever planned the lesson, they actually wouldn’t be missing out on an essential. And that helped me maintain my energy level and excitement over the course development process.
Be realistic about your energy levels
I had been playing around with video formats for Blou Designs since I started the Blou Designs YouTube channel at the end of 2020. Immediately prior to developing this course, I had also designed an instructional format that I love with a capital L-O-V-E (check it out in this video on How to use dropdowns to collect, find, and use your data | MS Excel). In an ideal world, every video of this course would have been created in that format. But, in the real world, that video format takes a lot of energy: I script it once for content, then I modify the script so that it reads well on the teleprompter (including bolding words that I want to emphasize and adding line breaks when I want to ensure a pause, and practicing a few times before recording), then I dress for the green screen and psych myself up to convey energy and interest in the topic with my facial expressions, hand gestures, and intonation, … (yes, there’s a SOP for this).
If I had approached this project with that format in mind, I would have quit. Not intentionally, but from pure fatigue.
I’m pretty comfortable on camera these days, but being on camera still saps my energy. So that much-beloved format had to go. In fact, I decided to remove myself entirely from the lessons and make them screen captures with voice overs. That would mean that the only energy I had to convey was through my voice, which is much easier for me to do.
Tied in with the MS OneNote title categories, I batched as much of the production work as possible in line with my energy levels.
Audio recordings
When I was feeling really awake, but I had already been speaking for a bit so my voice wasn’t “just woke up” raspy, I batch recorded a bunch of the scripts using Audacity. Each script was saved to its own file, even though I was doing them one after the other. I also used Audacity to normalize the audio recordings so that folks could binge listen to them without feeling like the audio was all over the place, and I exported them to WAV files, which is the format that my video editor of choice, Camtasia, requires.
Audio and energy levels is no joke. I decided to batch a few one evening while flagging a bit but wanting to get more done. When I listened to them the next day, they were horrible. I was obviously tired and it sounded like it was hard work to talk. I re-recorded the batch at a time when I had more energy, and actually shaved an entire 2 minutes off the final length of one of the videos just due to having more energy in delivery! Not only that, but, second time around, I actually sounded interested in the lesson, which I am!
Screen recordings
When I was feeling really awake, but maybe too raspy for audio, I would batch out screen recordings.
It’s remarkably easy to skip steps in a script, even when you’re the one writing the script or you’ve done the steps correctly a thousand times before, which is why it’s so important to be awake for this. But I also built in a few other safety measures to help prevent re-recording in the case of a skipped step. Before recording a screen capture, I would:
- read through the script to get clear on what I was supposed to be doing,
- make highlighted annotations about what the step was so I could scroll through the script and follow just the highlighted steps, or, as necessary, refresh my memory with the surrounding full-text script, knowing I could cut my reading time out in post-production,
- use Camtasia to do the screen recording.
To stay in the “head space” of the script, I followed these steps for a single script, in order, before moving on to the next script.
Video project files
Because of how I planned for implementation (i.e., mindful but thoughtless – see the next section for more on this), I was able to batch out a lot of the production work as well.
The first step for all of the lessons was to create a copy of my video lesson template file. Lesson by lesson, I would import the audio file and chop it up to eliminate breaks and errors so that it was ready to have the screen capture and annotations added. Before moving on, I would customize the title of the video, and create and sync up any graphics leading up to the screen capture part. In this way, I could fill some low-energy time while I was unable to create more audio recordings or screen captures.
The second way I filled low-energy streaks was by syncing screen captures to their audio counterparts and annotating as needed. This was very time consuming, but time consuming isn’t necessarily the same as energy demanding or energy sapping.
Plan for implementation in a way that, as much as possible, lets you be mindful but thoughtless (i.e., well-considered but requiring no real decision-making when it comes time for application)
Mindful but thoughtless. What do I mean by that? The “mindful” part means that you’ve really sat down and thought through what you need for this; things are planned as much as possible as opposed to ad hoc. In this case, that meant that standard things had a standard place, and things were labeled according to their use/function. The “thoughtless” part means that for all of those well-considered things that you could anticipate and standardize, you don’t need to make the decision(s) when it comes time to do that thing – the details of the implementation have been sorted, and you’re just following along without needing to put in a great deal of thought.
The nature of my course comes with a lot of on-screen annotations to supplement the screen and audio recordings. So, before I started editing together a single video, I designed a template file that would serve as the starting point of all videos in the course, as well as a custom and annotated library of assets. I also established a folder structure and file naming convention for everything before I started generating files.
Folder and file naming convention
I created a folder for each module, which contained all of that module’s audio recordings, video recordings, video project files, and any other related graphics. All lesson-related files were named according to that file’s lesson title so that they would cluster together in the file list; all that changed between them was the file extension. This also helped me double-check that the files I was loading into the video project were the audio and screen files for that project – at a glance, I could quickly see that all of the filenames for the currently open project matched.
Library assets
Aside from the main template structure, which I’ll get to shortly, having the same “look and feel” across the entire course required having annotations that would look and behave the same across all of the videos. To do this, I create my own library of custom assets, which I labeled according to their use.
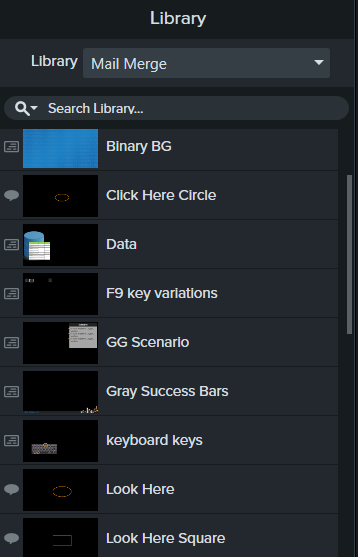
When the audio recording instructed students to “click,” I could look through the library for the annotation labeled “click here,” drag it onto the track, and adjust its size and placement to fit the screen capture. I made it an extra time saver by making sure these library assets already had fade transitions on either side of the asset so that I wouldn’t have to add them every time I added one of these to a video. If they were a set of things of that would always be grouped together, then they were added to the library as a group.
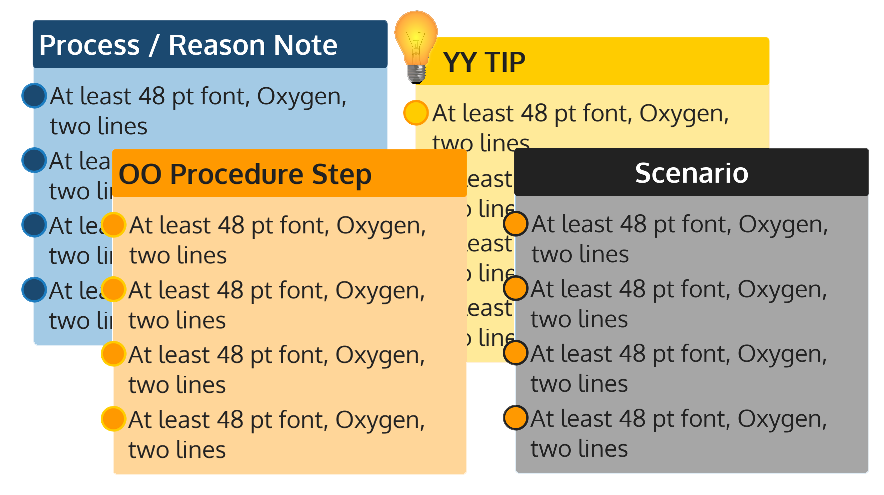
For “higher level” annotations, I designed four different block signs that could each contain up to four bullet items. These are color coded, but I also labeled them according to when to use that color:
- BB Process Reason Note: for process or concept-related annotations, like “What you’ll do”
- GG Scenario: to summarize the project scenarios in the module overview videos of Beginner’s Basics and Intermediate Topics
- OO Procedure Step: for leading students through a series of “how to” steps to follow to implement something
- YY TIP: for general tips and things to remember/recall, and for which I added a lightbulb icon to make it stand out from the rest of the block signs
In this way, I could say to myself, “here I’m talking through steps” and drag down OO Procedure onto the track, customizing and lining up the bullets in line with the audio.
I also used one of these to keep my own implementation in place for the project. Nearly every video would start with a BB Process block for “What you’ll do.” I prepopulated this in the template with a question for myself about checking that I had added noise reduction to the audio recording, so that I wouldn’t accidentally end up with stray videos with random fuzz in the background of my voice overs. As I edited that video, I would replace my noise reduction note with the note for the students for that lesson.
All of these supported mindful but thoughtless by sort of telling me what to do and when.
The video project template file
Every video of this course would start with the same intro screen, as well as have the same standard components (e.g., a logo bar, a track for main audio, a track for the screen recording). I used this format to create a standard set of labeled tracks for the video, knowing that anything on a lower track (shown here as further down the bulleted list) could potentially be covered up by something on a higher track:
- “W”: A prepopulated track for the W representing the icon for Microsoft Word, which stamped above anything else on the screen, and which appears at the beginning of every video.
- “Title”: A prepopulated track that contained my headshot and the video title, which appeared and faded out together. (I grouped these together so they wouldn’t need separate tracks.) These appear on every video, but the title needs to be customized to the current lesson.
- “Upper”: A prepopulated track that contained the upper framing bar, which had to appear on top of anything else that came on the screen, but behind the W.
- “Gray”: A prepopulated track for the gray bar and logo, which remain at the bottom of all videos at all times. (I grouped these graphics together so they wouldn’t need separate tracks.)
- “Lower”: A prepopulated track that contained the lower framing bar, which had to appear on top of anything else that came on the screen, but behind Gray. Lower, along with Upper and W, might fade off and on the screen separately, which is why they all needed to be on separate tracks rather than grouped together.
- (a few blank placeholder tracks with nothing on them, for annotations like “click here”, labeled with the generic Track # they were assigned by Camtasia)
- “Info”: A placeholder track for any block signs I might want to add to the screen.
- “Voice”: The placeholder track for the audio recording. It’s placed between the screen recording and the annotation layers to make syncing to the audio as easy as possible, because I have easy visual access to screen recording layers by scrolling down a bit and easy visual access to the annotations by scrolling up a bit.
- “Word 2”: A spare placeholder track in case I need to do a fade to smooth out a screen recording cut.
- “Word”: A placeholder track that served as the primary layer for holding the screen capture for Microsoft Word.
- “Cover”: A prepopulated white background that I sometimes fade in and out over the title screen background. To be used whenever there are annotations but no accompanying screen capture.
- “Binary”: A prepopulated bottom track of all video projects, which contains an image of 0s and 1s, and is used on all title screens.
Using this layer structure, I could open a new template file for a lesson, and always know where to put the audio recording or where to look for annotations that I wanted to tweak. I also wouldn’t forget to add a standard component, because there was either an empty track waiting for that thing by name or a prepopulated track ready to be time adjusted in line with the Voice track.
What I would do differently
I’m honestly thrilled with how this course came together, and my beta testers gave positive feedback, but there’s definitely room to improve this overall process.
Building in breaks
I pseudo built in breaks by taking “holidays” and by task switching between customizing the Teachable environment versus working on video production. These were sufficient for getting through the project, but what I really needed was a break that was more physical and that helped me take my mind completely off of the project and everything else. Following the advice of Michelle Forsyth, another vCN speaker, I would actively schedule in breaks for future big projects like this.
Outsourcing
Now that I know the process and what I want from it, I’m also ready to outsource some of the process for the next course I create – things I think are necessary but that are a slog for me: video subtitle and transcript cleanup, pasting the transcript into an appropriately labeled lesson section, and uploading all of the videos, thumbnails, and closed caption files for each lesson.
Resources
About Kat Sorbello: Kat Sorbello’s LinkedIn profile
How to use the Design your Online Course Template: How to use the Design your Online Course Template (from Kat’s YouTube channel The Stella Way for Online Course Creators)
About Michelle Forsythe: Michelle Forsythe’s LinkedIn profile
Get Audacity: Audacity ® | Free, open source, cross-platform audio software for multi-track recording and editing. (audacityteam.org)
Get Camtasia: Camtasia by Techsmith (affiliate link) An affiliate link means that, at no additional cost to you, I’ll receive a small commission if you make a purchase using this link. This allows me to continue to make free content like this article and all of my YouTube videos. If you choose to use it, thank you for your support! If you’re not into affiliate links, here’s a link to Camtasia without the affiliate stuff that will take you to the same place.
Teachable: https://teachable.com/
My course on Teachable: Mail Merge for Working with Form and Survey Data (FYI: This course is actually great for anyone that needs to create data-responsive reports from spreadsheet-style data. The examples just assume you’ve originally collected your data via a form or survey.)
—
If you’d like to learn more about editing in Camtasia, I’ve just released a video on how to turn a serendipitous Zoom moment into a marketing video. That video will introduce you to the very basics of editing, and you’ll be able to see what I mean by things like “tracks.”